Printers Help and Repair

Showing posts with label counter. Show all posts

Tuesday, November 26, 2019

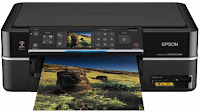
How to reset the protection counter of Epson PX700W Resetter

How to reset the protection counter of Epson PX700W Resetter


   Epson PX700W Adjustment Program

FIX PRINTER ERROR "parts inside printer end service life, waste ink pad counter overflow error"

Please follow the steps below to reset the protection counter effectively.


  1. Double click AdjProg.exe.
  2. Click “Accept” button.
  3. Click "Select" button. and select your printer model then click "OK"
  4. Click “Particular adjustment mode” button.
  5. Select on “Waste ink pad counter” and click “OK” button.
  6. Click on “Initialization” button and the program will reset the protection counter.
  7. Turn off the printer as a program instructed then turn on again.
  8. Click “Finish” button. and its done!
Warning: You might end up with ink leaking out of the printer if you dont either replace the waste ink pad or install external waste bin.

Monday, November 11, 2019

no image

Reset Waste Ink Counter Epson Stylus Photo RX640 Using Software Resetter

Software can be used to reset Epson Stylus Photo RX640 there is two. You can use adjutment program for Epson Stylus Photo RX640 or using SSC service utility, because sscserve v 4.30 support this printer.
Resetting Using Adjustment Program Epson Stylus Photo RX640
Important, before run adjustment program for Epson Stylus Photo RX640, aler date setting in the pc to 23 januari 2007. Date setting is needed to run adjustment program for Epson Stylus Photo RX640 without error.

  • Download and run adjutment program for Epson Stylus Photo RX640 by clicking AdjProg.exe and then Select particular adjustment mode.

  • Select usb port where printer Epson Stylus Photo RX640 installed

  • Select waste ink pad counter then click Ok
  • Click initialization button and the Epson Stylus Photo RX640 should be reset
Resetting Using SSC Service Utility
  • Download and install SSCServe.
  • Run SSC Service Utility and change the seting to rx640 and then close the windows setting.
  • Right click SSC Service Utility icon in the systay to view the menu.
  • Select protection counter and then select reset protection counter to reset the counter become zero.
Note : after resetting the printer turn off the printer and turn on again.

Monday, March 18, 2019

no image

Epson Stylus Pro 4000 Waste Ink Counter Reset

     While Powering up the printer, hold down the the left arrow, down arrow, and Up arrow buttons
    You will get a “Self Testing” message.
    Use the Up Arrow button to select the “Clear Counters” menu.
    Press the right arrow button (the Menu button).
    Scroll through with the up/down arrows to select “Maint Tank”
    Select with the right arrow and execute with the right arrow
    Turn your printer off then turn it back on.

Tuesday, March 5, 2019

no image

Reset Counter Epson RX650

Here this step to Reset Waste Ink Counter Printer Epson RX650

  1. Switch on printer
  2. Set the pc date setting to 13 february 2007
  3. Run adjprog.exe from the extracted folder
  4. Click accept
  5. Click particular adjustment mode
  6. Go to maintenance then Select waste ink pad counter then click ok
  7. Click on “check button till its done then click on initialization button then click on finish button
  8. Switch off printer for 5 secs then switch on again
  9. After you reset succesfully, you can change the date back to normal

Download Resetter Printer Epson RX650

Friday, March 1, 2019

no image

How to Reset Canon i255 and i320 Waste Ink Counter

Reset Methode for Canon Printers i255, i320

Step 1 : Manual for service mode
  1. Unplug power and USB.
  2. Open door and hold power button.
  3. Connect power.
  4. Close door, then release power button.
or try other step for manual service mode
  1. Turn off the printer. And disconnect the printer cable.
  2. Press and hold the POWER button, turn on the printer.
  3. The indicator LED should be green.
  4. Press and release the RESUME button , the indicator LED should be orange.
  5. Press and release the RESUME button again, the indicator LED should be green.
  6. Release both buttons.

Step 2 : Software for Permanent
  1. Reconnect the printer cable.
  2. Download and Run General Tools software resetter for Canon printers i320, i255 then
  3. Select USB PORT
  4. Choose SET DESTINATION 1 And it should be reset.
Remark “After service mode use software for permanent reset”

Wednesday, February 27, 2019

no image

Resetting Ink Counter Level on Canon Pixma iP1600

- the printer powered off but connected to a power source, press the Power button while pressing and holding
the Stop/ Reset button.
- When the Power is lit, press the Stop/Reset button two times while pressing and holding the Power button.
- When releasing the Power button and the Stop / Reset button (regardless of order), the printer will move into a
service mode. (Waiting for menu selection)
- When the on/off lights in green, press the Stop/Reset button the specified number of time(s) according to the
function listed in the table below.(Each time the Stop/Reset button is pressed, the LED lights alternately in
orange and green, starting with orange.)note: press 4 times for waste ink counter reset.

The number of the Reset button pressing
LED Function Remarks
0 time Green Power off
1 time Orange Service pattern print
2 times Green EEPROM print
3 times Orange EEPROM reset
4 times Green Waste ink counter reset
regards

Monday, February 11, 2019

no image

Canon i320 i255 Waste Ink Counter Reset

Canon i320, i255 Waste Ink Counter Reset.
Step 1 : Manual for service mode
1. Unplug power and USB.
2. Open door and hold power button.
3. Connect power.
4. Close door, then release power button.or
Step 1: Manual for service mode
1. Turn off the printer. And disconnect the printer cable.
2. Press and hold the POWER button, turn on the printer.
3. The indicator (L.E.D.) should be green.
4. Press and release the RESUME button , the indicator (L.E.D.) should be orange.
5. Press and release the RESUME button again, the indicator (L.E.D.) should be green.
6. Release both buttons.

Step 2 : Softwarefor Permanent
1. Reconnect the printer cable.
2. OpenGeneral Tools software and select (USB PORT)
3 .Choose (SET DESTINATION 1) And it should be reset.
Remark"After service mode Pls use software for permanent reset"